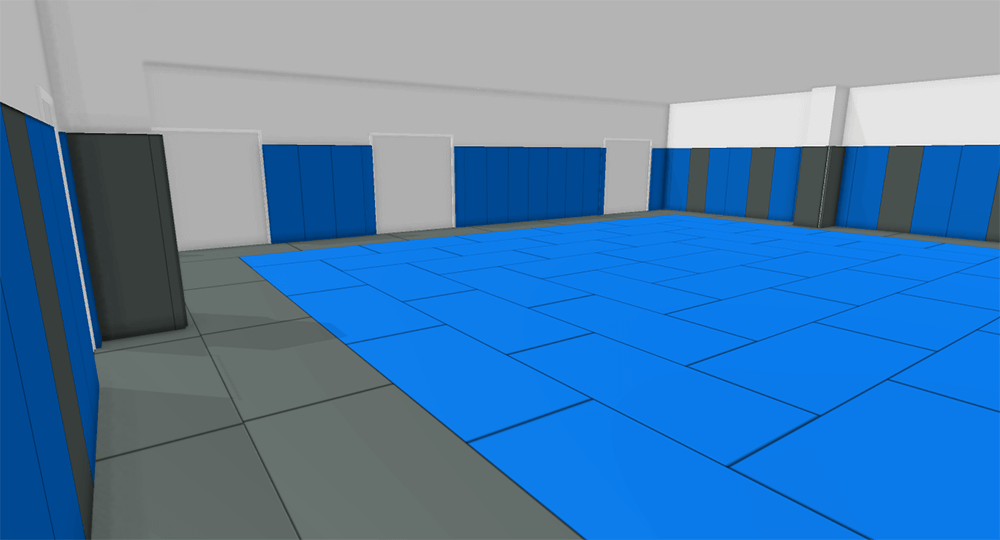
 Complex room designs created in Powertrak 3D Configurator
Floor space planning is a fluid and everchanging process. That is why it's crucial from a productivity standpoint for sales reps to build and present multiple design options with ease, speed, and accuracy!
Today, clients building new or redesigning an existing space expect a visual representation before moving forward with the project. For large, complex or expensive projects, providing an immersive experience is a value-add.
Decision-makers and key stakeholders need to visualize and virtually explore the layout to validate the relationships between rooms, spaces, traffic patterns, and other physical features prior to the start of construction.
Powertrak 3D Product Configurator is equipped with features to help sales professionals quickly and accurately build unique space layouts and furnish them with configurable products.
A floor space planning (FSP) feature that is easy-to-use and saves a ton of time is the auto-fill feature. It enables users to place a product, such as flooring, into the room and quickly extend it to the desired dimension. Not only does this feature quickly show a visual representation of the layout but it saves time and possible errors when calculating the flooring size, costs, and cuts.
How To Use The Powertrak Auto-fill Feature
To demonstrate how quick and easy the auto-fill feature is, I will walk through the steps to create a 37’ 7” x 30’ room, place three types of flooring in different sizes, and insert a wall pad in less than 90 seconds.
1. Outline Floor Dimensions
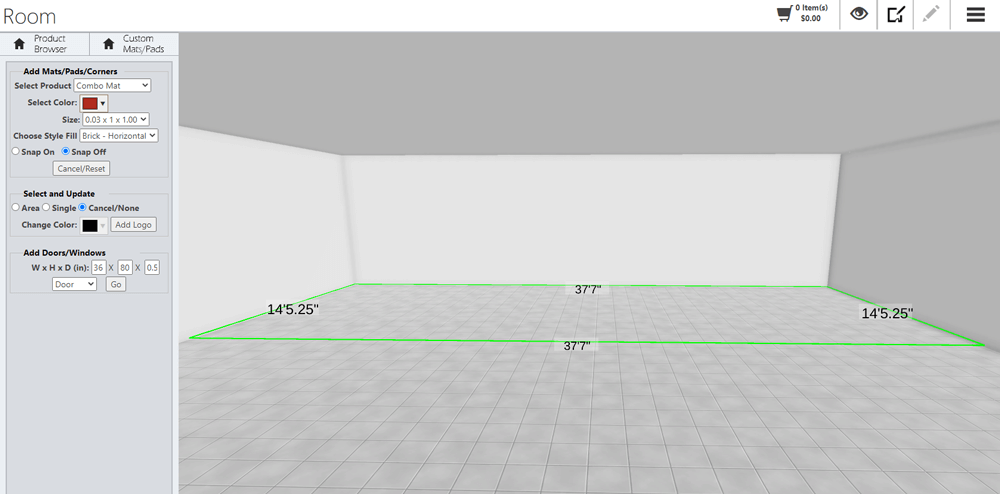
To begin, click on the CUSTOM MAT PAD and SELECT THE PRODUCT. I have selected a combo mat with a red, horizontal brick style fill. Next, use the outline tool to create the mat's dimensions. I have created a 37' 7" x 14' 5.25" outline where the mat will be placed. Click GO to place the mat.
2. Select Floor Type
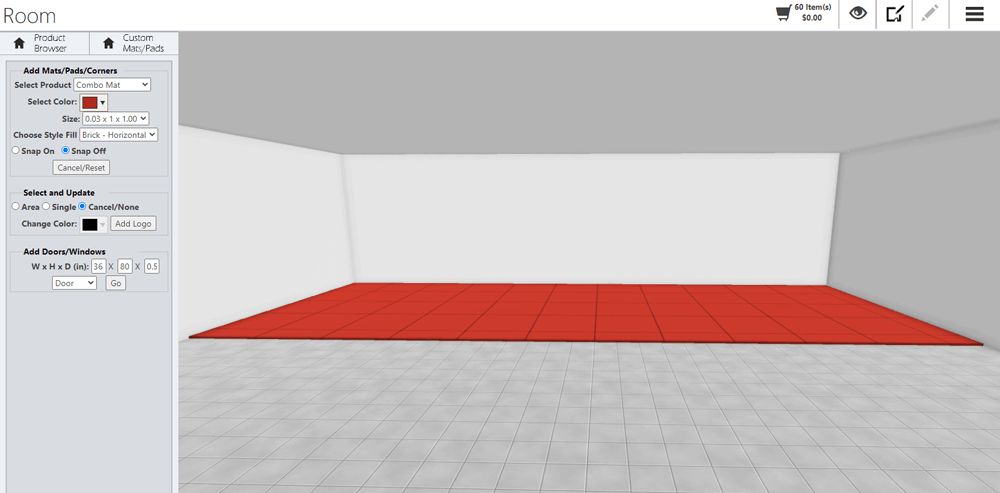
After clicking the GO button, the bricked mat appears in the room. If you don't like the style, color, size or placement, click CANCEL to restart the process.
3. Create Additional Flooring
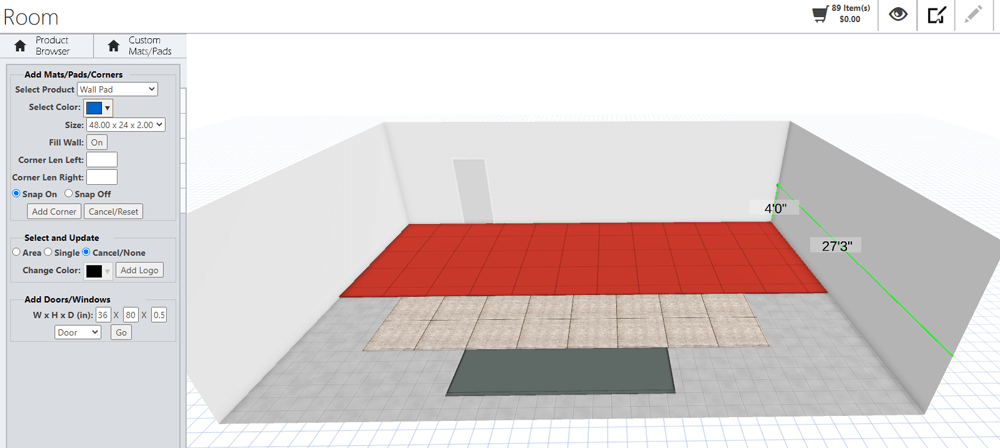
The process to add additional flooring types, colors, and sizes to the room is just as easy. Now, let's add a wall pad. On the east wall, I have outlined the placement for a 27' 3" x4' blue wall. Click GO to place the pad.
4. Add A Wall Pad
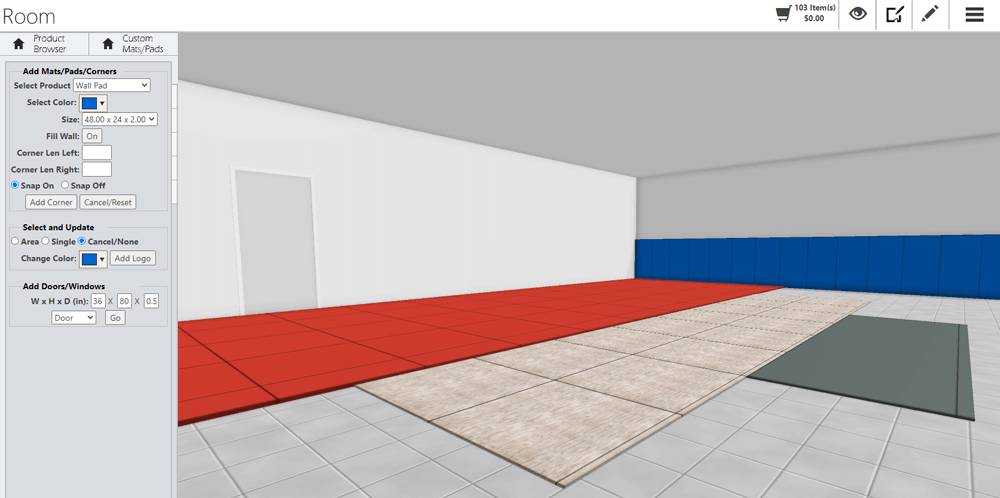
The blue wall pad now appears in the scene. For this demonstration, I have completed the room design. The next step is to add furnishings such as furniture, gym equipment, doors, windows, etc.
Note: There are two ways to add a wall pad to the wall. You can outline the specific dimensions, as I did in this example. The other method is to select the appropriate wall and click on the WALL FILL button. This function automatically adds the pad to the entire wall.
5. Review Design, Quote, BOM Specs
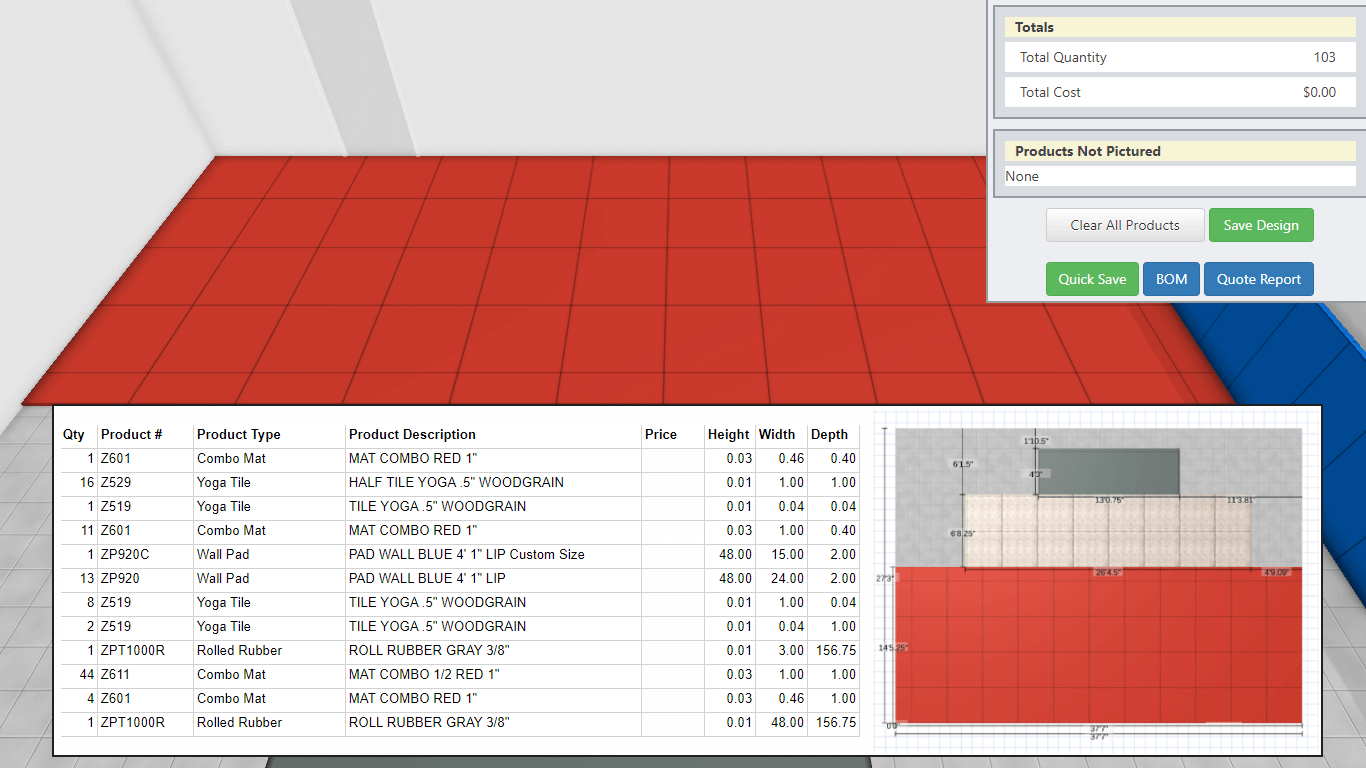
The room flooring and wall pad process is complete. You can save the project, send the design to someone, view the quote, review the bill of materials, and even experience the design in virtual reality or augmented reality.
The bill of materials gives the team details on the number of products, where to make cuts, and an exact location where they are to be placed in the room.
The auto-fill feature is not only applicable to flooring and wall products. It can be applied to other types of products. A future blog post will show how the auto-fill feature is used to customize counters in the foodservice industry.
Powertrak FSP Auto-fill Demonstration
Contact Axonom for Online Quoting and Ordering Solutions
Leverage Powertrak to build unique rooms, design spaces, configure products, quote, and send to decision-makers in 3D, VR or AR. Contact us on how to apply these types of solutions to your sales and marketing mix.
View Demos Request A Custom Demo